Diferencia entre revisiones de «Lotes»
m (→Pantry) |
|||
| Línea 1: | Línea 1: | ||
| − | {{Traducir}} | + | {{Traducir}} |
<div style="float: right; margin-left: 15px;">__TOC__</div> | <div style="float: right; margin-left: 15px;">__TOC__</div> | ||
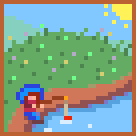
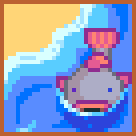
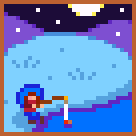
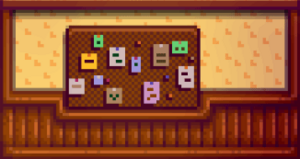
[[Bundles]] are donations to the [[Junimos]] given via golden scrolls inside the [[Community Center]]. When a bundle is complete, the Junimos offer you a reward. When all bundles for a particular room in the Community Center are complete, the Junimos grant a special reward that sometimes benefits the entire community. | [[Bundles]] are donations to the [[Junimos]] given via golden scrolls inside the [[Community Center]]. When a bundle is complete, the Junimos offer you a reward. When all bundles for a particular room in the Community Center are complete, the Junimos grant a special reward that sometimes benefits the entire community. | ||
| Línea 9: | Línea 9: | ||
Completing all bundles restores the Community Center back to brand new and unlocks the "Local Legend" [[Achievement]]. The day after all bundles are complete, there will be a cutscene showing the grand re-opening of the Community Center. (This event is triggered by entering [[Pelican Town]] Square.) | Completing all bundles restores the Community Center back to brand new and unlocks the "Local Legend" [[Achievement]]. The day after all bundles are complete, there will be a cutscene showing the grand re-opening of the Community Center. (This event is triggered by entering [[Pelican Town]] Square.) | ||
| − | If you opt to purchase a [[ | + | If you opt to purchase a [[MercaJoja]] Membership, the Community Center is turned into a [[Joja Warehouse]] instead. After this happens, the bundles will be completed by the Joja Corporation for a fee given to [[Morris]], the local MercaJoja manager, through the [[Joja Community Development Form]]. |
| − | [[File:Golden Scroll.png|thumb|right| | + | [[File:Golden Scroll.png|thumb|right|Nota de oro]] |
| − | '''Bundle Progress can be checked at any time''' by clicking on the Golden Scroll icon at the top right of the Player Menu (above the Garbage Can and | + | There are a total of 6 rooms and 30 bundles to complete in the Community Center. In the Joja Warehouse, there are 5 rewards to purchase (the "Friendship" reward is not available). |
| + | |||
| + | '''Bundle Progress can be checked at any time''' by clicking on the Golden Scroll icon at the top right of the Player Menu (above the Garbage Can and "organize" icons). | ||
==Travelling Cart Availability== | ==Travelling Cart Availability== | ||
All items required for bundles have a small chance of appearing in the [[Travelling Cart]] stock, except for the items listed below. These items will never be sold at the Travelling Cart: | All items required for bundles have a small chance of appearing in the [[Travelling Cart]] stock, except for the items listed below. These items will never be sold at the Travelling Cart: | ||
| − | + | {| | |
| − | + | |- | |
| − | + | |style="vertical-align: top; padding-right: 12px;"| | |
| + | {| | ||
| + | |- | ||
| + | |<ul><li></li></ul>||{{Quality|Melon|gold|24}} ||[[Melón]] (Calidad de oro) | ||
| + | |- | ||
| + | |<ul><li></li></ul>||{{Quality|Pumpkin|gold|24}} ||[[Calabaza]] (Calidad de oro) | ||
| + | |- | ||
| + | |<ul><li></li></ul>||{{Quality|Corn|gold|24}} ||[[Maíz]] (Calidad de oro) | ||
| + | |- | ||
| + | |} | ||
| + | |style="vertical-align: top; padding-right: 12px;"| | ||
*{{name|Aquamarine|link=Aguamarina|class=inline}} | *{{name|Aquamarine|link=Aguamarina|class=inline}} | ||
*{{name|Quartz|link=Cuarzo|class=inline}} | *{{name|Quartz|link=Cuarzo|class=inline}} | ||
*{{name|Earth Crystal|link=Cristal terrestre|class=inline}} | *{{name|Earth Crystal|link=Cristal terrestre|class=inline}} | ||
*{{name|Frozen Tear|link=Lágrima helada|class=inline}} | *{{name|Frozen Tear|link=Lágrima helada|class=inline}} | ||
| + | |style="vertical-align: top;"| | ||
*{{name|Fire Quartz|link=Cuarzo de fuego|class=inline}} | *{{name|Fire Quartz|link=Cuarzo de fuego|class=inline}} | ||
*{{name|Frozen Geode|link=Geoda de hielo|class=inline}} | *{{name|Frozen Geode|link=Geoda de hielo|class=inline}} | ||
*{{name|Hay|link=Heno|class=inline}} | *{{name|Hay|link=Heno|class=inline}} | ||
| + | |- | ||
| + | |} | ||
==Crafts Room== | ==Crafts Room== | ||
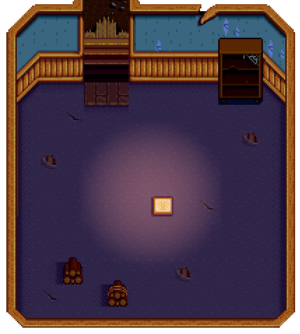
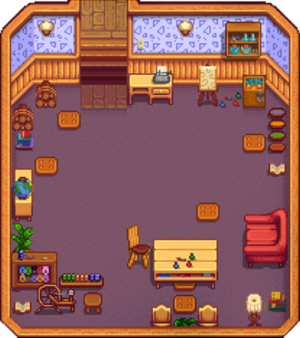
| − | [[File:Community Center Crafts Room.png|thumb|right]] | + | [[File:Community Center Crafts Room.png|thumb|right|Crafts Room Before Completion]] |
| − | [[File:Finished Crafts Room.png|thumb| | + | [[File:Finished Crafts Room.png|right|thumb|Crafts Room After Completion]] |
| − | |||
| − | |||
| − | |||
| − | |||
| − | |||
| + | The Crafts Room contains the first group of bundles available. Completing all Crafts Room bundles repairs the bridge east of [[The Mines]], giving you access to the [[Quarry]]. | ||
{| | {| | ||
| | | | ||
| − | {| class="wikitable" | + | {| class="wikitable" style="border-collapse: collapse;" |
| − | ! | + | |- |
| − | | id="cellstretch" |[[Quarry|Bridge Repair]] | + | !style="background-color: #41AEFF; border-right: 0;"|[[File:Bundle Complete Balloon.png|link=]] |
| + | !style="background-color: #41AEFF; border-left: 0;"|Crafts Room Reward | ||
| + | | id="cellstretch" style="padding-left: 8px;"|[[Quarry|Bridge Repair]] | ||
|} | |} | ||
{| class="wikitable" | {| class="wikitable" | ||
| Línea 49: | Línea 62: | ||
| rowspan=4 |[[File:Spring Foraging Bundle.png|center]] | | rowspan=4 |[[File:Spring Foraging Bundle.png|center]] | ||
| rowspan=4 |[[File:Bundle Slot.png|center|link=]][[File:Bundle Slot.png|center|link=]][[File:Bundle Slot.png|center|link=]][[File:Bundle Slot.png|center|link=]] | | rowspan=4 |[[File:Bundle Slot.png|center|link=]][[File:Bundle Slot.png|center|link=]][[File:Bundle Slot.png|center|link=]][[File:Bundle Slot.png|center|link=]] | ||
| − | |{{name|Wild Horseradish|link=Wild Horseradish}} | + | | {{name|Wild Horseradish|link=Wild Horseradish}} |
| − | | id="cellstretch" |[[ | + | | id="cellstretch" |[[Spring]] [[Foraging]] |
|- | |- | ||
| − | |{{name| | + | |{{name|Daffodil}} |
| − | |[[ | + | |[[Spring]] [[Foraging]], buy from [[Pierre]] at [[Flower Dance]] |
|- | |- | ||
| − | |{{name| | + | |{{name|Leek}} |
| − | |[[ | + | |[[Spring]] [[Foraging]] |
|- | |- | ||
| − | |{{name| | + | |{{name|Dandelion}} |
| − | |[[ | + | |[[Spring]] [[Foraging]], buy from [[Pierre]] at [[Flower Dance]] |
|- | |- | ||
| colspan=2 id="cellcenter" |[[File:Bundle Reward.png|18px|link=]] Reward: | | colspan=2 id="cellcenter" |[[File:Bundle Reward.png|18px|link=]] Reward: | ||
| Línea 69: | Línea 82: | ||
| rowspan=3 |[[File:Summer Foraging Bundle.png|center]] | | rowspan=3 |[[File:Summer Foraging Bundle.png|center]] | ||
| rowspan=3 id="cellmiddle" |[[File:Bundle Slot.png|center|link=]][[File:Bundle Slot.png|center|link=]][[File:Bundle Slot.png|center|link=]] | | rowspan=3 id="cellmiddle" |[[File:Bundle Slot.png|center|link=]][[File:Bundle Slot.png|center|link=]][[File:Bundle Slot.png|center|link=]] | ||
| − | |{{name| | + | |{{name|Grape}} |
| − | | id="cellstretch" |[[Foraging]] | + | | id="cellstretch" |[[Summer]] [[Foraging]], [[Fall]] [[Farming]] |
|- | |- | ||
| − | |{{name| | + | |{{name|Spice Berry}} |
| − | |[[Foraging]] | + | |[[Summer]] [[Foraging]], [[The Cave|The Farm Cave]] (fruit bat option) |
|- | |- | ||
| − | |{{name| | + | |{{name|Sweet Pea}} |
| − | |[[ | + | |[[Summer]] [[Foraging]] |
|- | |- | ||
| colspan=2 id="cellcenter" |[[File:Bundle Reward.png|18px|link=]] Reward: | | colspan=2 id="cellcenter" |[[File:Bundle Reward.png|18px|link=]] Reward: | ||
| Línea 86: | Línea 99: | ||
| rowspan=4 |[[File:Fall Foraging Bundle.png|center]] | | rowspan=4 |[[File:Fall Foraging Bundle.png|center]] | ||
| rowspan=4 id="cellmiddle" |[[File:Bundle Slot.png|center|link=]][[File:Bundle Slot.png|center|link=]][[File:Bundle Slot.png|center|link=]][[File:Bundle Slot.png|center|link=]] | | rowspan=4 id="cellmiddle" |[[File:Bundle Slot.png|center|link=]][[File:Bundle Slot.png|center|link=]][[File:Bundle Slot.png|center|link=]][[File:Bundle Slot.png|center|link=]] | ||
| − | |{{name| | + | | {{name|Common Mushroom}} |
| − | | id="cellstretch" |[[Foraging]] | + | | id="cellstretch" |[[Fall]] [[Foraging]], [[Spring]] & [[Fall]] [[Foraging]] in the [[Secret Woods]], [[The Cave|The Farm Cave]] (mushroom option), [[Tapper|Tapping]] a [[Mushroom Tree]] |
|- | |- | ||
| − | |{{name| | + | |{{name|Wild Plum}} |
| − | |[[ | + | |[[Fall]] [[Foraging]] |
|- | |- | ||
| − | |{{name| | + | |{{name|Hazelnut}} |
| − | |[[ | + | |[[Fall]] [[Foraging]] |
|- | |- | ||
| − | |{{name| | + | |{{name|Blackberry}} |
| − | |[[Foraging]] | + | |[[Fall]] [[Foraging]], [[The Cave|The Farm Cave]] (fruit bat option) |
|- | |- | ||
| colspan=2 id="cellcenter" |[[File:Bundle Reward.png|18px|link=]] Reward: | | colspan=2 id="cellcenter" |[[File:Bundle Reward.png|18px|link=]] Reward: | ||
| Línea 106: | Línea 119: | ||
| rowspan=4 |[[File:Winter Foraging Bundle.png|center]] | | rowspan=4 |[[File:Winter Foraging Bundle.png|center]] | ||
| rowspan=4 id="cellmiddle" |[[File:Bundle Slot.png|center|link=]][[File:Bundle Slot.png|center|link=]][[File:Bundle Slot.png|center|link=]][[File:Bundle Slot.png|center|link=]] | | rowspan=4 id="cellmiddle" |[[File:Bundle Slot.png|center|link=]][[File:Bundle Slot.png|center|link=]][[File:Bundle Slot.png|center|link=]][[File:Bundle Slot.png|center|link=]] | ||
| − | |{{name| | + | | {{name|Winter Root}} |
| − | | id="cellstretch" |[[ | + | | id="cellstretch" |[[Hoe|Tilling]] soil or [[Artifact Spot]]s in [[Winter]], dropped by Blue [[Slimes]] on levels 41-79 of [[The Mines]] |
|- | |- | ||
| − | |{{name| | + | |{{name|Crystal Fruit}} |
| − | |[[ | + | |[[Winter]] [[Foraging]], dropped by [[Dust Sprite]]s on levels 41-79 of [[The Mines]] |
|- | |- | ||
| − | |{{name| | + | |{{name|Snow Yam}} |
| − | |[[ | + | |[[Hoe|Tilling]] soil or [[Artifact Spot]]s in [[Winter]] |
|- | |- | ||
| − | |{{name| | + | |{{name|Crocus}} |
| − | |[[ | + | |[[Winter]] [[Foraging]] |
|- | |- | ||
| colspan=2 id="cellcenter" |[[File:Bundle Reward.png|18px|link=]] Reward: | | colspan=2 id="cellcenter" |[[File:Bundle Reward.png|18px|link=]] Reward: | ||
| Línea 126: | Línea 139: | ||
| rowspan=4 |[[File:Construction Bundle.png|center]] | | rowspan=4 |[[File:Construction Bundle.png|center]] | ||
| rowspan=4 id="cellmiddle" |[[File:Bundle Slot.png|center|link=]][[File:Bundle Slot.png|center|link=]][[File:Bundle Slot.png|center|link=]][[File:Bundle Slot.png|center|link=]] | | rowspan=4 id="cellmiddle" |[[File:Bundle Slot.png|center|link=]][[File:Bundle Slot.png|center|link=]][[File:Bundle Slot.png|center|link=]][[File:Bundle Slot.png|center|link=]] | ||
| − | |{{name|Wood|99}} | + | | {{name|Wood|99}} |
| − | | id="cellstretch" |Chopping | + | | id="cellstretch" |Chopping [[Trees]] or branches with an [[Axe]] |
|- | |- | ||
|{{name|Wood|99}} | |{{name|Wood|99}} | ||
| − | |Chopping | + | |Chopping [[Trees]] or branches with an [[Axe]] |
|- | |- | ||
|{{name|Stone|99}} | |{{name|Stone|99}} | ||
| − | |Smashing stones with a | + | |Smashing stones with a [[Pickaxe]] |
|- | |- | ||
|{{name|Hardwood|10}} | |{{name|Hardwood|10}} | ||
| − | |Chopping | + | |Chopping [[Large Stump]]s or [[Large Log]]s with an upgraded [[Axe]], smashing crates in [[The Mines]] |
|- | |- | ||
| colspan=2 id="cellcenter" |[[File:Bundle Reward.png|18px|link=]] Reward: | | colspan=2 id="cellcenter" |[[File:Bundle Reward.png|18px|link=]] Reward: | ||
| − | | colspan=2 | {{name|Charcoal Kiln| | + | | colspan=2 | {{name|Charcoal Kiln|1}} |
|} | |} | ||
{| class="wikitable" | {| class="wikitable" | ||
| Línea 146: | Línea 159: | ||
| rowspan=9 |[[File:Exotic Foraging Bundle.png|center]] | | rowspan=9 |[[File:Exotic Foraging Bundle.png|center]] | ||
| rowspan=9 |[[File:Bundle Slot.png|center|link=]][[File:Bundle Slot.png|center|link=]][[File:Bundle Slot.png|center|link=]][[File:Bundle Slot.png|center|link=]][[File:Bundle Slot.png|center|link=]] | | rowspan=9 |[[File:Bundle Slot.png|center|link=]][[File:Bundle Slot.png|center|link=]][[File:Bundle Slot.png|center|link=]][[File:Bundle Slot.png|center|link=]][[File:Bundle Slot.png|center|link=]] | ||
| − | |{{name| | + | | {{name|Coconut}} |
| − | | id="cellstretch" | | + | | id="cellstretch" |[[Desert]] [[Foraging]] |
|- | |- | ||
| − | |{{name| | + | |{{name|Cactus Fruit}} |
| − | | | + | |[[Desert]] [[Foraging]] |
|- | |- | ||
| − | |{{name| | + | |{{name|Cave Carrot}} |
| − | | | + | |[[The Mines]], either smashing boxes or [[Hoe|tilling]] soil |
|- | |- | ||
| − | |{{name| | + | |{{name|Red Mushroom}} |
| − | | | + | |[[Foraging]] in [[The Mines]], [[Summer]] or [[Fall]] [[Foraging]] in the [[Secret Woods]], [[The Cave|The Farm Cave]] (mushroom option), [[Tapper|Tapping]] a [[Mushroom Tree]] |
|- | |- | ||
| − | |{{name| | + | |{{name|Purple Mushroom}} |
| − | | | + | |[[The Mines]], [[The Cave|The Farm Cave]] (mushroom option), [[Farm Maps|Forest Farm Map]] [[Foraging]] in [[Fall]] |
|- | |- | ||
| − | |{{name| | + | |{{name|Maple Syrup}} |
| − | | | + | |[[Tapper|Tapped]] [[Maple Tree]] |
|- | |- | ||
| − | |{{name| | + | |{{name|Oak Resin}} |
| − | | | + | |[[Tapper|Tapped]] [[Oak Tree]] |
|- | |- | ||
| − | |{{name| | + | |{{name|Pine Tar}} |
| − | | | + | |[[Tapper|Tapped]] [[Pine Tree]] |
|- | |- | ||
| − | |{{name| | + | |{{name|Morel}} |
| − | | | + | |[[Foraging]] in the [[Secret Woods]] in [[Spring]], [[The Cave|The Farm Cave]] (mushroom option) |
|- | |- | ||
| colspan=2 id="cellcenter" |[[File:Bundle Reward.png|18px|link=]] Reward: | | colspan=2 id="cellcenter" |[[File:Bundle Reward.png|18px|link=]] Reward: | ||
| − | | colspan=2 | {{name| | + | | colspan=2 | {{name|Autumn's Bounty|5}} |
|} | |} | ||
|} | |} | ||
==Alacena== | ==Alacena== | ||
| − | [[File:Community Center Pantry.png|thumb|right]] | + | [[File:Community Center Pantry.png|thumb|right|Pantry Before Completion]] |
| − | [[File:Finished Pantry.png|thumb|right | + | [[File:Finished Pantry.png|thumb|right|Pantry After Completion]] |
| − | |||
| − | |||
| − | Completing | + | The Pantry appears after completing one bundle. Completing all Pantry bundles will restore the dilapidated [[Greenhouse]] on your farm, making it available to grow [[Crops]] and [[Fruit Trees]] year-round. |
{| | {| | ||
| | | | ||
| − | {| class="wikitable" | + | {| class="wikitable" style="border-collapse: collapse;" |
| − | ! | + | |- |
| − | | id="cellstretch" |[[Greenhouse]] | + | !style="background-color: #41AEFF; border-right: 0;"|[[File:Bundle Complete Balloon.png|link=]] |
| + | !style="background-color: #41AEFF; border-left: 0;"|Pantry Reward | ||
| + | | id="cellstretch" style="padding-left: 8px;"|[[Greenhouse]] | ||
|} | |} | ||
{| class="wikitable" | {| class="wikitable" | ||
| Línea 197: | Línea 210: | ||
| rowspan=4 |[[File:Spring Crops Bundle.png|center]] | | rowspan=4 |[[File:Spring Crops Bundle.png|center]] | ||
| rowspan=4 |[[File:Bundle Slot.png|center|link=]][[File:Bundle Slot.png|center|link=]][[File:Bundle Slot.png|center|link=]][[File:Bundle Slot.png|center|link=]] | | rowspan=4 |[[File:Bundle Slot.png|center|link=]][[File:Bundle Slot.png|center|link=]][[File:Bundle Slot.png|center|link=]][[File:Bundle Slot.png|center|link=]] | ||
| − | |{{name| | + | | {{name|Parsnip}} |
| − | | id="cellstretch" |[[ | + | | id="cellstretch" |[[Spring]] [[Crops]] |
|- | |- | ||
| − | |{{name| | + | |{{name|Green Bean}} |
| − | |[[ | + | |[[Spring]] [[Crops]] |
|- | |- | ||
| − | |{{name| | + | |{{name|Cauliflower}} |
| − | |[[ | + | |[[Spring]] [[Crops]] |
|- | |- | ||
| − | |{{name| | + | |{{name|Potato}} |
| − | |[[ | + | |[[Spring]] [[Crops]] |
|- | |- | ||
| colspan=2 id="cellcenter" |[[File:Bundle Reward.png|18px|link=]] Reward: | | colspan=2 id="cellcenter" |[[File:Bundle Reward.png|18px|link=]] Reward: | ||
| Línea 217: | Línea 230: | ||
| rowspan=4 |[[File:Summer Crops Bundle.png|center]] | | rowspan=4 |[[File:Summer Crops Bundle.png|center]] | ||
| rowspan=4 id="cellmiddle" |[[File:Bundle Slot.png|center|link=]][[File:Bundle Slot.png|center|link=]][[File:Bundle Slot.png|center|link=]][[File:Bundle Slot.png|center|link=]] | | rowspan=4 id="cellmiddle" |[[File:Bundle Slot.png|center|link=]][[File:Bundle Slot.png|center|link=]][[File:Bundle Slot.png|center|link=]][[File:Bundle Slot.png|center|link=]] | ||
| − | |{{name| | + | | {{name|Tomato}} |
| − | | id="cellstretch" |[[ | + | | id="cellstretch" |[[Summer]] [[Crops]] |
|- | |- | ||
| − | |{{name| | + | |{{name|Hot Pepper}} |
| − | |[[ | + | |[[Summer]] [[Crops]] |
|- | |- | ||
| − | |{{name| | + | |{{name|Blueberry}} |
| − | |[[ | + | |[[Summer]] [[Crops]] |
|- | |- | ||
| − | |{{name| | + | |{{name|Melon}} |
| − | |[[ | + | |[[Summer]] [[Crops]] |
|- | |- | ||
| colspan=2 id="cellcenter" |[[File:Bundle Reward.png|18px|link=]] Reward: | | colspan=2 id="cellcenter" |[[File:Bundle Reward.png|18px|link=]] Reward: | ||
| − | | colspan=2 | {{name|Quality Sprinkler| | + | | colspan=2 | {{name|Quality Sprinkler|1}} |
|} | |} | ||
{| class="wikitable" | {| class="wikitable" | ||
| Línea 237: | Línea 250: | ||
| rowspan=4 |[[File:Fall Crops Bundle.png|center]] | | rowspan=4 |[[File:Fall Crops Bundle.png|center]] | ||
| rowspan=4 id="cellmiddle" |[[File:Bundle Slot.png|center|link=]][[File:Bundle Slot.png|center|link=]][[File:Bundle Slot.png|center|link=]][[File:Bundle Slot.png|center|link=]] | | rowspan=4 id="cellmiddle" |[[File:Bundle Slot.png|center|link=]][[File:Bundle Slot.png|center|link=]][[File:Bundle Slot.png|center|link=]][[File:Bundle Slot.png|center|link=]] | ||
| − | |{{name| | + | | {{name|Corn}} |
| − | | id="cellstretch" |[[ | + | | id="cellstretch" |[[Summer]] / [[Fall]] [[Crops]] |
|- | |- | ||
| − | |{{name| | + | |{{name|Eggplant}} |
| − | |[[ | + | |[[Fall]] [[Crops]] |
|- | |- | ||
| − | |{{name| | + | |{{name|Pumpkin}} |
| − | |[[ | + | |[[Fall]] [[Crops]] |
|- | |- | ||
| − | |{{name| | + | |{{name|Yam}} |
| − | |[[ | + | |[[Fall]] [[Crops]] |
|- | |- | ||
| colspan=2 id="cellcenter" |[[File:Bundle Reward.png|18px|link=]] Reward: | | colspan=2 id="cellcenter" |[[File:Bundle Reward.png|18px|link=]] Reward: | ||
| − | | colspan=2 | {{name|Bee House| | + | | colspan=2 | {{name|Bee House|1}} |
|} | |} | ||
{| class="wikitable" | {| class="wikitable" | ||
| Línea 257: | Línea 270: | ||
| rowspan=4 |[[File:Quality Crops Bundle.png|center]] | | rowspan=4 |[[File:Quality Crops Bundle.png|center]] | ||
| rowspan=4 id="cellmiddle" |[[File:Bundle Slot.png|center|link=]][[File:Bundle Slot.png|center|link=]][[File:Bundle Slot.png|center|link=]] | | rowspan=4 id="cellmiddle" |[[File:Bundle Slot.png|center|link=]][[File:Bundle Slot.png|center|link=]][[File:Bundle Slot.png|center|link=]] | ||
| − | |{{Quality|Parsnip|gold|24}} [[Parsnip]] (5) | + | |<table><tr><td>{{Quality|Parsnip|gold|24}}</td><td> [[Parsnip]]</td><td> (5)</td></tr></table> |
| − | | id="cellstretch" |[[ | + | | id="cellstretch" |Gold quality [[Spring]] [[Crops]] |
|- | |- | ||
| − | |{{Quality|Melon|gold|24}} [[Melon]] (5) | + | |<table><tr><td>{{Quality|Melon|gold|24}}</td><td> [[Melon]]</td><td> (5)</td></tr></table> |
| − | |[[ | + | |Gold quality [[Summer]] [[Crops]] |
|- | |- | ||
| − | |{{Quality|Pumpkin|gold|24}} [[Pumpkin]] (5) | + | |<table><tr><td>{{Quality|Pumpkin|gold|24}}</td><td> [[Pumpkin]]</td><td> (5)</td></tr></table> |
| − | |[[ | + | |Gold quality [[Fall]] [[Crops]] |
|- | |- | ||
| − | |{{Quality|Corn|gold|24}} [[Corn]] (5) | + | |<table><tr><td>{{Quality|Corn|gold|24}}</td><td> [[Corn]]</td><td> (5)</td></tr></table> |
| − | |[[ | + | |Gold quality [[Summer]] / [[Fall]] [[Crops]] |
|- | |- | ||
| colspan=2 id="cellcenter" |[[File:Bundle Reward.png|18px|link=]] Reward: | | colspan=2 id="cellcenter" |[[File:Bundle Reward.png|18px|link=]] Reward: | ||
| − | | colspan=2 | {{name|Preserves Jar| | + | | colspan=2 | {{name|Preserves Jar|1}} |
|} | |} | ||
{| class="wikitable" | {| class="wikitable" | ||
| Línea 277: | Línea 290: | ||
| rowspan=6 |[[File:Animal Bundle.png|center]] | | rowspan=6 |[[File:Animal Bundle.png|center]] | ||
| rowspan=6 id="cellmiddle" |[[File:Bundle Slot.png|center|link=]][[File:Bundle Slot.png|center|link=]][[File:Bundle Slot.png|center|link=]][[File:Bundle Slot.png|center|link=]][[File:Bundle Slot.png|center|link=]] | | rowspan=6 id="cellmiddle" |[[File:Bundle Slot.png|center|link=]][[File:Bundle Slot.png|center|link=]][[File:Bundle Slot.png|center|link=]][[File:Bundle Slot.png|center|link=]][[File:Bundle Slot.png|center|link=]] | ||
| − | |{{name|Large Milk}} | + | | {{name|Large Milk}} |
| id="cellstretch" |[[Cow|Cows]] | | id="cellstretch" |[[Cow|Cows]] | ||
|- | |- | ||
| Línea 296: | Línea 309: | ||
|- | |- | ||
| colspan=2 id="cellcenter" |[[File:Bundle Reward.png|18px|link=]] Reward: | | colspan=2 id="cellcenter" |[[File:Bundle Reward.png|18px|link=]] Reward: | ||
| − | | colspan=2 | {{name|Cheese Press| | + | | colspan=2 | {{name|Cheese Press|1}} |
|} | |} | ||
{| class="wikitable" | {| class="wikitable" | ||
| Línea 303: | Línea 316: | ||
| rowspan=12 |[[File:Artisan Bundle.png|center]] | | rowspan=12 |[[File:Artisan Bundle.png|center]] | ||
| rowspan=12 |[[File:Bundle Slot.png|center|link=]][[File:Bundle Slot.png|center|link=]][[File:Bundle Slot.png|center|link=]][[File:Bundle Slot.png|center|link=]][[File:Bundle Slot.png|center|link=]][[File:Bundle Slot.png|center|link=]] | | rowspan=12 |[[File:Bundle Slot.png|center|link=]][[File:Bundle Slot.png|center|link=]][[File:Bundle Slot.png|center|link=]][[File:Bundle Slot.png|center|link=]][[File:Bundle Slot.png|center|link=]][[File:Bundle Slot.png|center|link=]] | ||
| − | |{{name|Truffle Oil| | + | |{{name|Truffle Oil|1}} |
| − | | id="cellstretch" |Made from | + | | id="cellstretch" |Made from [[Truffle]]s using an [[Oil Maker]] |
|- | |- | ||
|{{name|Cloth|link=Cloth}} | |{{name|Cloth|link=Cloth}} | ||
| − | | | + | |[[Loom]], [[Recycling Machine|Recycling]] a [[Soggy Newspaper]] |
|- | |- | ||
|{{name|Goat Cheese}} | |{{name|Goat Cheese}} | ||
| − | | | + | |[[Cheese Press]] |
|- | |- | ||
|{{name|Cheese}} | |{{name|Cheese}} | ||
| − | | | + | |[[Cheese Press]] |
|- | |- | ||
|{{name|Honey}} | |{{name|Honey}} | ||
| − | | | + | |[[Bee House]] |
|- | |- | ||
|{{name|Jelly}} | |{{name|Jelly}} | ||
| − | | | + | |[[Preserves Jar]] |
|- | |- | ||
|{{name|Apple}} | |{{name|Apple}} | ||
| − | | | + | |[[Apple Tree]]s during [[Fall]], [[The Cave|The Farm Cave]] (fruit bat option) |
|- | |- | ||
|{{name|Apricot}} | |{{name|Apricot}} | ||
| − | | | + | |[[Apricot Tree]]s during [[Spring]], [[The Cave|The Farm Cave]] (fruit bat option) |
|- | |- | ||
|{{name|Orange}} | |{{name|Orange}} | ||
| − | | | + | |[[Orange Tree]]s during [[Summer]], [[The Cave|The Farm Cave]] (fruit bat option) |
|- | |- | ||
|{{name|Peach}} | |{{name|Peach}} | ||
| − | | | + | |[[Peach Tree]]s during [[Summer]], [[The Cave|The Farm Cave]] (fruit bat option) |
|- | |- | ||
|{{name|Pomegranate}} | |{{name|Pomegranate}} | ||
| − | | | + | |[[Pomegranate Tree]]s during [[Fall]], [[The Cave|The Farm Cave]] (fruit bat option) |
|- | |- | ||
|{{name|Cherry}} | |{{name|Cherry}} | ||
| − | | | + | |[[Cherry Tree]]s during [[Spring]], [[The Cave|The Farm Cave]] (fruit bat option) |
|- | |- | ||
| colspan=2 id="cellcenter" |[[File:Bundle Reward.png|18px|link=]] Reward: | | colspan=2 id="cellcenter" |[[File:Bundle Reward.png|18px|link=]] Reward: | ||
| − | | colspan=2 |{{name|Keg| | + | | colspan=2 |{{name|Keg|1}} |
|} | |} | ||
|} | |} | ||
==Fish Tank== | ==Fish Tank== | ||
| − | [[File:Community Center Fish Tank.png|thumb|right]] | + | [[File:Community Center Fish Tank.png|thumb|right|Fish Tank Before Completion]] |
| − | [[File:Finished Fish Tank.png|thumb|right]] | + | [[File:Finished Fish Tank.png|thumb|right|Fish Tank After Completion]] |
| + | |||
| + | The Fish Tank appears after completing one bundle. Completing all Fish Tank bundles will remove the Glittering Boulder to the left of [[The Mines]] entrance. [[Willy]] will also give you a [[Copper Pan]] that can be used to collect metal ores and other items from bodies of water. | ||
| − | |||
Note: It may not be possible to finish the Specialty Fish Bundle before finishing the entire Vault section, as you need access to the [[Desert]] to get a [[Sandfish]], unless it becomes available at the [[Traveling Cart]]. | Note: It may not be possible to finish the Specialty Fish Bundle before finishing the entire Vault section, as you need access to the [[Desert]] to get a [[Sandfish]], unless it becomes available at the [[Traveling Cart]]. | ||
| − | |||
{| | {| | ||
| | | | ||
| − | {| class="wikitable" | + | {| class="wikitable" style="border-collapse: collapse;" |
| − | ! | + | |- |
| − | | id="cellstretch" |Glittering Boulder Removed | + | !style="background-color: #41AEFF; border-right: 0;"|[[File:Bundle Complete Balloon.png|link=]] |
| + | !style="background-color: #41AEFF; border-left: 0;"|Fish Tank Reward | ||
| + | | id="cellstretch" style="padding-left: 8px;"|Glittering Boulder Removed | ||
|} | |} | ||
{| class="wikitable" | {| class="wikitable" | ||
| Línea 363: | Línea 378: | ||
| rowspan=4 |[[File:River Fish Bundle.png|center]] | | rowspan=4 |[[File:River Fish Bundle.png|center]] | ||
| rowspan=4 |[[File:Bundle Slot.png|center|link=]][[File:Bundle Slot.png|center|link=]][[File:Bundle Slot.png|center|link=]][[File:Bundle Slot.png|center|link=]] | | rowspan=4 |[[File:Bundle Slot.png|center|link=]][[File:Bundle Slot.png|center|link=]][[File:Bundle Slot.png|center|link=]][[File:Bundle Slot.png|center|link=]] | ||
| − | |{{name| | + | |{{name|Sunfish}} |
| − | | id="cellstretch" |Found in Rivers, | + | | id="cellstretch" |Found in Rivers, 6:00 AM – 7:00 PM, [[Spring]], and [[Summer]]. |
|- | |- | ||
| − | |{{name| | + | |{{name|Catfish}} |
| − | |Found in Rivers, Anytime, [[Spring]] and [[Fall]]. Only when raining. | + | |Found in Rivers, Anytime, [[Spring]] and [[Fall]]; Secret Woods Pond in [[Summer]]. Only when raining. |
|- | |- | ||
| − | |{{name| | + | |{{name|Shad}} |
|Found in Rivers, Anytime, [[Spring]], [[Summer]], and [[Fall]]. Only when raining. | |Found in Rivers, Anytime, [[Spring]], [[Summer]], and [[Fall]]. Only when raining. | ||
|- | |- | ||
| − | |{{name| | + | |{{name|Tiger Trout}} |
| − | |Found in Rivers, | + | |Found in Rivers, 6:00 AM – 7:00 PM, [[Fall]] and [[Winter]]. |
|- | |- | ||
| colspan=2 id="cellcenter" |[[File:Bundle Reward.png|18px|link=]] Reward: | | colspan=2 id="cellcenter" |[[File:Bundle Reward.png|18px|link=]] Reward: | ||
| Línea 383: | Línea 398: | ||
| rowspan=4 |[[File:Lake Fish Bundle.png|center]] | | rowspan=4 |[[File:Lake Fish Bundle.png|center]] | ||
| rowspan=4 |[[File:Bundle Slot.png|center|link=]][[File:Bundle Slot.png|center|link=]][[File:Bundle Slot.png|center|link=]][[File:Bundle Slot.png|center|link=]] | | rowspan=4 |[[File:Bundle Slot.png|center|link=]][[File:Bundle Slot.png|center|link=]][[File:Bundle Slot.png|center|link=]][[File:Bundle Slot.png|center|link=]] | ||
| − | |{{name| | + | |{{name|Largemouth Bass}} |
| − | | id="cellstretch" |Found in Lakes, | + | | id="cellstretch" |Found in Lakes, 6:00 AM – 7:00 PM, All Seasons. |
|- | |- | ||
| − | |{{name| | + | |{{name|Carp}} |
|Found in Lakes, Anytime, [[Spring]], [[Summer]], and [[Fall]]. | |Found in Lakes, Anytime, [[Spring]], [[Summer]], and [[Fall]]. | ||
|- | |- | ||
| − | |{{name| | + | |{{name|Bullhead}} |
|Found in Lakes, Anytime, All Seasons. | |Found in Lakes, Anytime, All Seasons. | ||
|- | |- | ||
| − | |{{name| | + | |{{name|Sturgeon}} |
| − | |Found in Lakes, | + | |Found in Lakes, 6:00 AM – 7:00 PM , [[Summer]] and [[Winter]]. |
|- | |- | ||
| colspan=2 id="cellcenter" |[[File:Bundle Reward.png|18px|link=]] Reward: | | colspan=2 id="cellcenter" |[[File:Bundle Reward.png|18px|link=]] Reward: | ||
| − | | colspan=2 | {{name|Dressed Spinner| | + | | colspan=2 | {{name|Dressed Spinner|1}} |
|} | |} | ||
{| class="wikitable" | {| class="wikitable" | ||
| Línea 403: | Línea 418: | ||
| rowspan=4 |[[File:Ocean Fish Bundle.png|center]] | | rowspan=4 |[[File:Ocean Fish Bundle.png|center]] | ||
| rowspan=4 id="cellmiddle" |[[File:Bundle Slot.png|center|link=]][[File:Bundle Slot.png|center|link=]][[File:Bundle Slot.png|center|link=]][[File:Bundle Slot.png|center|link=]] | | rowspan=4 id="cellmiddle" |[[File:Bundle Slot.png|center|link=]][[File:Bundle Slot.png|center|link=]][[File:Bundle Slot.png|center|link=]][[File:Bundle Slot.png|center|link=]] | ||
| − | |{{name| | + | |{{name|Sardine}} |
| − | | id="cellstretch" |Found in the Ocean, | + | | id="cellstretch" |Found in the Ocean, 6:00 AM – 7:00 PM, [[Spring]], [[Fall]], and [[Winter]]. |
|- | |- | ||
| − | |{{name|Tuna | + | |{{name|Tuna}} |
| − | |Found in the Ocean, | + | |Found in the Ocean, 6:00 AM – 7:00 PM, [[Summer]] and [[Winter]]. |
|- | |- | ||
| − | |{{name| | + | |{{name|Red Snapper}} |
| − | |Found in the Ocean, | + | |Found in the Ocean, 6:00 AM – 7:00 PM, [[Summer]] and [[Fall]]. Only when raining. |
|- | |- | ||
| − | |{{name| | + | |{{name|Tilapia}} |
| − | |Found in the Ocean, | + | |Found in the Ocean, 6:00 AM – 2:00 PM, [[Summer]] and [[Fall]]. |
|- | |- | ||
| colspan=2 id="cellcenter" |[[File:Bundle Reward.png|18px|link=]] Reward: | | colspan=2 id="cellcenter" |[[File:Bundle Reward.png|18px|link=]] Reward: | ||
| Línea 423: | Línea 438: | ||
| rowspan=3 |[[File:Night Fishing Bundle.png|center]] | | rowspan=3 |[[File:Night Fishing Bundle.png|center]] | ||
| rowspan=3 id="cellmiddle" |[[File:Bundle Slot.png|center|link=]][[File:Bundle Slot.png|center|link=]][[File:Bundle Slot.png|center|link=]] | | rowspan=3 id="cellmiddle" |[[File:Bundle Slot.png|center|link=]][[File:Bundle Slot.png|center|link=]][[File:Bundle Slot.png|center|link=]] | ||
| − | |{{name| | + | |{{name|Walleye}} |
| − | |Found in Rivers, [[Fall]]. Only when raining. | + | |Found in Rivers, 12:00 PM – 2:00 AM, [[Fall]]. Only when raining. |
|- | |- | ||
| − | |{{name| | + | |{{name|Bream}} |
| − | |Found in Rivers, | + | |Found in Rivers, 6:00 PM – 2:00 AM, All Seasons. |
|- | |- | ||
| − | |{{name| | + | |{{name|Eel}} |
| − | |Found in the Ocean, | + | |Found in the Ocean, 4:00 PM – 2:00 AM, [[Spring]] or [[Fall]]. Only when raining. |
|- | |- | ||
| colspan=2 id="cellcenter" |[[File:Bundle Reward.png|18px|link=]] Reward: | | colspan=2 id="cellcenter" |[[File:Bundle Reward.png|18px|link=]] Reward: | ||
| − | | colspan=2 | {{name|Small Glow Ring| | + | | colspan=2 | {{name|Small Glow Ring|1}} |
|} | |} | ||
{| class="wikitable" | {| class="wikitable" | ||
| Línea 440: | Línea 455: | ||
| rowspan=10 |[[File:Crab Pot Bundle.png|center]] | | rowspan=10 |[[File:Crab Pot Bundle.png|center]] | ||
| rowspan=10 id="cellmiddle" |[[File:Bundle Slot.png|center|link=]][[File:Bundle Slot.png|center|link=]][[File:Bundle Slot.png|center|link=]][[File:Bundle Slot.png|center|link=]][[File:Bundle Slot.png|center|link=]] | | rowspan=10 id="cellmiddle" |[[File:Bundle Slot.png|center|link=]][[File:Bundle Slot.png|center|link=]][[File:Bundle Slot.png|center|link=]][[File:Bundle Slot.png|center|link=]][[File:Bundle Slot.png|center|link=]] | ||
| − | |{{name| | + | |{{name|Lobster}} |
| − | | id="cellstretch" | | + | | id="cellstretch" |Caught in [[Crab Pot]]s |
|- | |- | ||
| − | |{{name| | + | |{{name|Crayfish}} |
| − | | | + | |Caught in [[Crab Pot]]s |
|- | |- | ||
| − | |{{name| | + | |{{name|Crab}} |
| − | | | + | |Caught in [[Crab Pot]]s, drops from [[Rock Crab]]s in [[The Mines]] |
|- | |- | ||
| − | |{{name| | + | |{{name|Cockle}} |
| − | | | + | |Caught in [[Crab Pot]]s, [[The Beach|Beach]] [[Foraging]] |
|- | |- | ||
| − | |{{name| | + | |{{name|Mussel}} |
| − | | | + | |Caught in [[Crab Pot]]s, [[The Beach|Beach]] [[Foraging]] |
|- | |- | ||
| − | |{{name| | + | |{{name|Shrimp}} |
| − | | | + | |Caught in [[Crab Pot]]s |
|- | |- | ||
| − | |{{name| | + | |{{name|Snail}} |
| − | | | + | |Caught in [[Crab Pot]]s |
|- | |- | ||
| − | |{{name| | + | |{{name|Periwinkle}} |
| − | | | + | |Caught in [[Crab Pot]]s |
|- | |- | ||
| − | |{{name| | + | |{{name|Oyster}} |
| − | | | + | |Caught in [[Crab Pot]]s, [[The Beach|Beach]] [[Foraging]] |
|- | |- | ||
| − | |{{name| | + | |{{name|Clam}} |
| − | | | + | |Caught in [[Crab Pot]]s, [[The Beach|Beach]] [[Foraging]] |
|- | |- | ||
| colspan=2 id="cellcenter" |[[File:Bundle Reward.png|18px|link=]] Reward: | | colspan=2 id="cellcenter" |[[File:Bundle Reward.png|18px|link=]] Reward: | ||
| Línea 478: | Línea 493: | ||
| rowspan=4 |[[File:Specialty Fish Bundle.png|center]] | | rowspan=4 |[[File:Specialty Fish Bundle.png|center]] | ||
| rowspan=4 id="cellmiddle" |[[File:Bundle Slot.png|center|link=]][[File:Bundle Slot.png|center|link=]][[File:Bundle Slot.png|center|link=]][[File:Bundle Slot.png|center|link=]] | | rowspan=4 id="cellmiddle" |[[File:Bundle Slot.png|center|link=]][[File:Bundle Slot.png|center|link=]][[File:Bundle Slot.png|center|link=]][[File:Bundle Slot.png|center|link=]] | ||
| − | |{{name| | + | |{{name|Pufferfish}} |
| − | | id="cellstretch" |Found in the Ocean, | + | | id="cellstretch" |Found in the Ocean, 12:00 PM – 4:00 PM, [[Summer]]. |
|- | |- | ||
| − | |{{name| | + | |{{name|Ghostfish}} |
|Found in ponds in [[The Mines]], Anytime, All Seasons. May also be dropped by [[Ghost|Ghosts]]. | |Found in ponds in [[The Mines]], Anytime, All Seasons. May also be dropped by [[Ghost|Ghosts]]. | ||
|- | |- | ||
| − | |{{name| | + | |{{name|Sandfish}} |
| − | |Found in the pond at [[Calico Desert]]. | + | |Found in the pond at [[Calico Desert]], 6:00 AM – 10:00 PM, All Seasons. |
|- | |- | ||
| − | |{{name| | + | |{{name|Woodskip}} |
|Found in the [[Secret Woods]], Anytime, All Seasons. | |Found in the [[Secret Woods]], Anytime, All Seasons. | ||
|- | |- | ||
| Línea 496: | Línea 511: | ||
==Boiler Room== | ==Boiler Room== | ||
| − | [[File:Community Center Boiler Room.png|thumb|right]] | + | [[File:Community Center Boiler Room.png|thumb|right|Boiler Room Before Completion]] |
| − | [[File:Finished Boiler Room.png|thumb|right]] | + | [[File:Finished Boiler Room.png|thumb|right|Boiler Room After Completion]] |
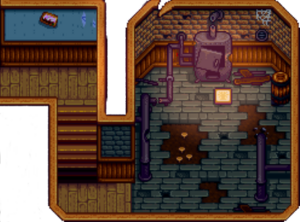
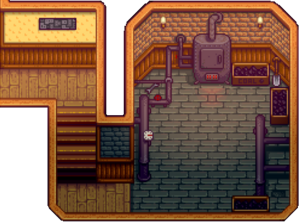
| − | The Boiler Room appears after completing two bundles. | + | The Boiler Room appears after completing two bundles. Completing all Boiler Room bundles repairs the [[Minecart]]s, allowing you to fast travel between distant locations. |
| − | |||
| − | Completing | ||
{| | {| | ||
| | | | ||
| − | {| class="wikitable" | + | {| class="wikitable" style="border-collapse: collapse;" |
| − | ! | + | |- |
| − | | id="cellstretch" |[[ | + | !style="background-color: #41AEFF; border-right: 0;"|[[File:Bundle Complete Balloon.png|link=]] |
| + | !style="background-color: #41AEFF; border-left: 0;"|Boiler Room Reward | ||
| + | | id="cellstretch" style="padding-left: 8px;"|[[Minecart]]s Repaired | ||
|} | |} | ||
{| class="wikitable" | {| class="wikitable" | ||
| Línea 514: | Línea 529: | ||
| rowspan=3 |[[File:Blacksmith Bundle.png|center]] | | rowspan=3 |[[File:Blacksmith Bundle.png|center]] | ||
| rowspan=3 |[[File:Bundle Slot.png|center|link=]][[File:Bundle Slot.png|center|link=]][[File:Bundle Slot.png|center|link=]] | | rowspan=3 |[[File:Bundle Slot.png|center|link=]][[File:Bundle Slot.png|center|link=]][[File:Bundle Slot.png|center|link=]] | ||
| − | |{{name| | + | |{{name|Copper Bar}} |
| − | | id="cellstretch" | Smelting [[Copper Ore]] in the [[ | + | | id="cellstretch" | Smelting [[Copper Ore]] in the [[Furnace]] |
|- | |- | ||
| − | |{{name| | + | |{{name|Iron Bar}} |
| − | | Smelting [[Iron Ore]] in the [[ | + | | Smelting [[Iron Ore]] in the [[Furnace]], [[Crafting]] the "Transmute (Fe)" recipe |
|- | |- | ||
| − | |{{name| | + | |{{name|Gold Bar}} |
| − | | Smelting [[Gold Ore]] in the [[ | + | | Smelting [[Gold Ore]] in the [[Furnace]], [[Crafting]] the "Transmute (Au)" recipe |
|- | |- | ||
| colspan=2 id="cellcenter" |[[File:Bundle Reward.png|18px|link=]] Reward: | | colspan=2 id="cellcenter" |[[File:Bundle Reward.png|18px|link=]] Reward: | ||
| − | | colspan=2 | {{name|Furnace| | + | | colspan=2 | {{name|Furnace|1}} |
|} | |} | ||
{| class="wikitable" | {| class="wikitable" | ||
| Línea 531: | Línea 546: | ||
| rowspan=4 |[[File:Geologist's Bundle.png|center]] | | rowspan=4 |[[File:Geologist's Bundle.png|center]] | ||
| rowspan=4 |[[File:Bundle Slot.png|center|link=]][[File:Bundle Slot.png|center|link=]][[File:Bundle Slot.png|center|link=]][[File:Bundle Slot.png|center|link=]] | | rowspan=4 |[[File:Bundle Slot.png|center|link=]][[File:Bundle Slot.png|center|link=]][[File:Bundle Slot.png|center|link=]][[File:Bundle Slot.png|center|link=]] | ||
| − | |{{name| | + | |{{name|Quartz}} |
| − | | id="cellstretch" | | + | | id="cellstretch" | [[Minerals#Foraged Minerals|Foraging]] on all levels of [[The Mines]] |
|- | |- | ||
| − | |{{name| | + | |{{name|Earth Crystal}} |
| − | | | + | | [[Minerals#Foraged Minerals|Foraging]] on Levels 1-39 of [[The Mines]], [[Geode]]s, drop from [[Duggy|Duggies]] in the Mines (floors 1-29) |
|- | |- | ||
| − | |{{name| | + | |{{name|Frozen Tear}} |
| − | | | + | |[[Minerals#Foraged Minerals|Foraging]] on Levels 40-79 of [[The Mines]], [[Frozen Geode]]s, drop from [[Dust Sprite]]s in the Mines (floors 40-80) |
|- | |- | ||
| − | |{{name| | + | |{{name|Fire Quartz}} |
| − | | | + | |[[Minerals#Foraged Minerals|Foraging]] on Levels 80-120 of [[The Mines]], [[Magma Geode]], [[Omni Geode]] |
|- | |- | ||
| colspan=2 id="cellcenter" |[[File:Bundle Reward.png|18px|link=]] Reward: | | colspan=2 id="cellcenter" |[[File:Bundle Reward.png|18px|link=]] Reward: | ||
| Línea 552: | Línea 567: | ||
| rowspan=4 |[[File:Bundle Slot.png|center|link=]][[File:Bundle Slot.png|center|link=]] | | rowspan=4 |[[File:Bundle Slot.png|center|link=]][[File:Bundle Slot.png|center|link=]] | ||
|{{name|Slime|99}} | |{{name|Slime|99}} | ||
| − | | id="cellstretch" | Dropped by [[Slimes]] | + | | id="cellstretch" | Dropped by [[Slimes]] |
|- | |- | ||
|{{name|Bat Wing|10}} | |{{name|Bat Wing|10}} | ||
| − | | Dropped by [[Bats]] in [[The Mines]] | + | | Dropped by [[Bats]] in [[The Mines]] |
|- | |- | ||
| − | |{{name| | + | |{{name|Solar Essence}} |
| − | | Dropped by [[Ghost]]s in [[The Mines]] | + | | Dropped by [[Ghost]]s, [[Squid Kid]]s, or [[Metal Head]]s in [[The Mines]], dropped by [[Mummy|Mummies]] in the [[Skull Cavern]] |
|- | |- | ||
| − | |{{name| | + | |{{name|Void Essence}} |
| − | |Dropped by [[Shadow Brute]]s in [[The Mines]] | + | |Dropped by [[Shadow Brute]]s in [[The Mines]] or [[Serpent]]s in the [[Skull Cavern]] |
|- | |- | ||
| colspan=2 id="cellcenter" |[[File:Bundle Reward.png|18px|link=]] Reward: | | colspan=2 id="cellcenter" |[[File:Bundle Reward.png|18px|link=]] Reward: | ||
| − | | colspan=2 | {{name|Small Magnet Ring| | + | | colspan=2 | {{name|Small Magnet Ring|1}} |
|} | |} | ||
|} | |} | ||
==Bulletin Board== | ==Bulletin Board== | ||
| − | [[File:Community Center Bulletin Board.png|thumb|right]] | + | [[File:Community Center Bulletin Board.png|thumb|right|Bulletin Board Before Completion]] |
| − | [[File:Finished Bulletin Board.png|thumb|right]] | + | [[File:Finished Bulletin Board.png|thumb|right|Bulletin Board After Completion]] |
The Bulletin Board appears after completing three bundles. | The Bulletin Board appears after completing three bundles. | ||
| − | Completing | + | Completing all Bulletin Board bundles improves the player's [[friendship]] rating with every [[Villagers#Non-marriage candidates|non-datable villager]] by two hearts (500 points). |
| + | |||
| + | The morning after, Mayor [[Lewis]] will send a letter saying that packages containing items posted about "years ago" on the community center bulletin board have been appearing in villagers' homes. He says the packages are all addressed from "your farm." He expresses his gratitude and says "all of us in town are delighted!" | ||
{| | {| | ||
| | | | ||
| − | {| class="wikitable" | + | {| class="wikitable" style="border-collapse: collapse;" |
| − | ! | + | |- |
| − | | id="cellstretch" |Friendship | + | !style="background-color: #41AEFF; border-right: 0;"|[[File:Bundle Complete Balloon.png|link=]] |
| + | !style="background-color: #41AEFF; border-left: 0;"|Bulletin Board Reward | ||
| + | | id="cellstretch" style="padding-left: 8px;"|[[Friendship]] ♡ | ||
|} | |} | ||
{| class="wikitable" | {| class="wikitable" | ||
| Línea 587: | Línea 606: | ||
| rowspan=6 |[[File:Chef's Bundle.png|center]] | | rowspan=6 |[[File:Chef's Bundle.png|center]] | ||
| rowspan=6 |[[File:Bundle Slot.png|center|link=]][[File:Bundle Slot.png|center|link=]][[File:Bundle Slot.png|center|link=]][[File:Bundle Slot.png|center|link=]][[File:Bundle Slot.png|center|link=]][[File:Bundle Slot.png|center|link=]] | | rowspan=6 |[[File:Bundle Slot.png|center|link=]][[File:Bundle Slot.png|center|link=]][[File:Bundle Slot.png|center|link=]][[File:Bundle Slot.png|center|link=]][[File:Bundle Slot.png|center|link=]][[File:Bundle Slot.png|center|link=]] | ||
| − | |{{name| | + | |{{name|Maple Syrup}} |
| − | | id="cellstretch" | | + | | id="cellstretch" | [[Tapper|Tapped]] [[Maple Tree]] |
|- | |- | ||
|{{name|Fiddlehead Fern|link=Fiddlehead Fern}} | |{{name|Fiddlehead Fern|link=Fiddlehead Fern}} | ||
| − | | | + | | [[Summer]] [[Foraging]] in the [[Secret Woods]] |
|- | |- | ||
| − | |{{name| | + | |{{name|Truffle}} |
| − | | | + | | [[Pig]]s |
|- | |- | ||
| − | |{{name| | + | |{{name|Poppy}} |
| − | | [[ | + | | [[Summer]] [[Crops]] |
|- | |- | ||
| − | |{{name| | + | |{{name|Maki Roll}} |
| − | | | + | | [[Cooking]] (recipe sources: [[Television#Cooking Channel (Queen of Sauce)|Cooking Channel]], [[The Stardrop Saloon|The Saloon]]) |
|- | |- | ||
| − | |{{name| | + | |{{name|Fried Egg}} |
| − | | | + | | [[Cooking]] |
|- | |- | ||
| colspan=2 id="cellcenter" |[[File:Bundle Reward.png|18px|link=]] Reward: | | colspan=2 id="cellcenter" |[[File:Bundle Reward.png|18px|link=]] Reward: | ||
| − | | colspan=2 |{{name|Pink Cake| | + | | colspan=2 |{{name|Pink Cake|3}} |
|} | |} | ||
{| class="wikitable" | {| class="wikitable" | ||
| Línea 613: | Línea 632: | ||
| rowspan=6 |[[File:Dye Bundle.png|center]] | | rowspan=6 |[[File:Dye Bundle.png|center]] | ||
| rowspan=6 |[[File:Bundle Slot.png|center|link=]][[File:Bundle Slot.png|center|link=]][[File:Bundle Slot.png|center|link=]][[File:Bundle Slot.png|center|link=]][[File:Bundle Slot.png|center|link=]][[File:Bundle Slot.png|center|link=]] | | rowspan=6 |[[File:Bundle Slot.png|center|link=]][[File:Bundle Slot.png|center|link=]][[File:Bundle Slot.png|center|link=]][[File:Bundle Slot.png|center|link=]][[File:Bundle Slot.png|center|link=]][[File:Bundle Slot.png|center|link=]] | ||
| − | |{{name| | + | |{{name|Red Mushroom}} |
| − | | id="cellstretch" | | + | | id="cellstretch" | [[Foraging]] in [[The Mines]], [[Summer]] or [[Fall]] [[Foraging]] in the [[Secret Woods]], [[The Cave|The Farm Cave]] (mushroom option), [[Tapper|Tapping]] a [[Mushroom Tree]] |
|- | |- | ||
| − | |{{name| | + | |{{name|Sea Urchin}} |
| − | | | + | | [[The Beach|Beach]] [[Foraging]], after using 300 wood to fix the bridge to the right side of the beach |
|- | |- | ||
|{{name|Sunflower|link=Sunflower}} | |{{name|Sunflower|link=Sunflower}} | ||
| − | | [[ | + | | [[Summer]] / [[Fall]] [[Crops]] |
|- | |- | ||
| − | |{{name| | + | |{{name|Duck Feather}} |
| − | | | + | | [[Duck]]s |
|- | |- | ||
| − | |{{name| | + | |{{name|Aquamarine}} |
| − | | | + | | [[Mining#Mining Nodes|Aquamarine Nodes]] and boxes in [[The Mines]] |
|- | |- | ||
| − | |{{name| | + | |{{name|Red Cabbage}} |
| − | | [[Crops]] | + | | [[Summer]] [[Crops]] ([[Red Cabbage Seeds]] are available at [[Pierre's General Store]] in year 2+) |
|- | |- | ||
| colspan=2 id="cellcenter" |[[File:Bundle Reward.png|18px|link=]] Reward: | | colspan=2 id="cellcenter" |[[File:Bundle Reward.png|18px|link=]] Reward: | ||
| − | | colspan=2 |{{name|Seed Maker| | + | | colspan=2 |{{name|Seed Maker|1}} |
|} | |} | ||
{| class="wikitable" | {| class="wikitable" | ||
| Línea 639: | Línea 658: | ||
| rowspan=4 |[[File:Field Research Bundle.png|center]] | | rowspan=4 |[[File:Field Research Bundle.png|center]] | ||
| rowspan=4 |[[File:Bundle Slot.png|center|link=]][[File:Bundle Slot.png|center|link=]][[File:Bundle Slot.png|center|link=]][[File:Bundle Slot.png|center|link=]] | | rowspan=4 |[[File:Bundle Slot.png|center|link=]][[File:Bundle Slot.png|center|link=]][[File:Bundle Slot.png|center|link=]][[File:Bundle Slot.png|center|link=]] | ||
| − | |{{name| | + | |{{name|Purple Mushroom}} |
| − | | id="cellstretch" | | + | | id="cellstretch" |[[The Mines]], [[The Cave|The Farm Cave]] (mushroom option), [[Farm Maps|Forest Farm Map]] [[Foraging]] in [[Fall]] |
|- | |- | ||
| − | |{{name| | + | |{{name|Nautilus Shell}} |
| − | |Note: | + | |[[Winter]] [[The Beach|Beach]] [[Foraging]] (Note: NOT the [[Nautilus Fossil]] artifact) |
|- | |- | ||
| − | |{{name| | + | |{{name|Chub}} |
|Can be found in the mountain lake and river during all seasons. | |Can be found in the mountain lake and river during all seasons. | ||
|- | |- | ||
| − | |{{name| | + | |{{name|Frozen Geode}} |
| − | | | + | |[[The Mines]] Levels 40-79 |
|- | |- | ||
| colspan=2 id="cellcenter" |[[File:Bundle Reward.png|18px|link=]] Reward: | | colspan=2 id="cellcenter" |[[File:Bundle Reward.png|18px|link=]] Reward: | ||
| − | | colspan=2 |{{name|Recycling Machine| | + | | colspan=2 |{{name|Recycling Machine|1}} |
|} | |} | ||
{| class="wikitable" | {| class="wikitable" | ||
| Línea 660: | Línea 679: | ||
| rowspan=3 |[[File:Bundle Slot.png|center|link=]][[File:Bundle Slot.png|center|link=]][[File:Bundle Slot.png|center|link=]] | | rowspan=3 |[[File:Bundle Slot.png|center|link=]][[File:Bundle Slot.png|center|link=]][[File:Bundle Slot.png|center|link=]] | ||
|{{name|Wheat|10}} | |{{name|Wheat|10}} | ||
| − | | id="cellstretch" | [[ | + | | id="cellstretch" |[[Summer]] / [[Fall]] [[Crops]] |
|- | |- | ||
|{{name|Hay|10}} | |{{name|Hay|10}} | ||
| − | | | + | | Purchase from [[Marnie]] at [[The Ranch]], harvest grass with the [[Scythe]] once you have a [[Silo]] |
|- | |- | ||
|{{name|Apple|3}} | |{{name|Apple|3}} | ||
| − | | | + | | [[Apple Tree]]s during [[Fall]] |
|- | |- | ||
| colspan=2 id="cellcenter" |[[File:Bundle Reward.png|18px|link=]] Reward: | | colspan=2 id="cellcenter" |[[File:Bundle Reward.png|18px|link=]] Reward: | ||
| − | | colspan=2 |{{name|Heater| | + | | colspan=2 |{{name|Heater|1}} |
|} | |} | ||
{| class="wikitable" | {| class="wikitable" | ||
| Línea 676: | Línea 695: | ||
| rowspan=4 |[[File:Enchanter's Bundle.png|center]] | | rowspan=4 |[[File:Enchanter's Bundle.png|center]] | ||
| rowspan=4 |[[File:Bundle Slot.png|center|link=]][[File:Bundle Slot.png|center|link=]][[File:Bundle Slot.png|center|link=]][[File:Bundle Slot.png|center|link=]] | | rowspan=4 |[[File:Bundle Slot.png|center|link=]][[File:Bundle Slot.png|center|link=]][[File:Bundle Slot.png|center|link=]][[File:Bundle Slot.png|center|link=]] | ||
| − | |{{name| | + | |{{name|Oak Resin}} |
| − | | id="cellstretch" | | + | | id="cellstretch" | [[Tapper|Tapped]] [[Oak Tree]] |
|- | |- | ||
| − | |{{name| | + | |{{name|Wine}} |
| − | | | + | | [[Keg]] |
|- | |- | ||
| − | |{{name| | + | |{{name|Rabbit's Foot}} |
| − | | | + | | [[Rabbit]]s, [[Serpent]] drop in [[Skull Cavern]] (0.8%) |
|- | |- | ||
| − | |{{name| | + | |{{name|Pomegranate}} |
| − | | | + | |[[Pomegranate Tree]]s during [[Fall]], [[The Cave|The Farm Cave]] (fruit bat option) |
|- | |- | ||
| colspan=2 id="cellcenter" |[[File:Bundle Reward.png|18px|link=]] Reward: | | colspan=2 id="cellcenter" |[[File:Bundle Reward.png|18px|link=]] Reward: | ||
| Línea 692: | Línea 711: | ||
|} | |} | ||
|} | |} | ||
| − | |||
| − | |||
==Vault== | ==Vault== | ||
| − | [[File:Community Center Vault.png|thumb|right]] | + | [[File:Community Center Vault.png|thumb|right|Vault Before Completion]] |
| − | [[File:Finished Vault Room.png|thumb|right]] | + | [[File:Finished Vault Room.png|thumb|right|Valut After Completion]] |
| − | The Vault becomes available after completing four bundles. | + | The Vault becomes available after completing four bundles. Pressing the large "purchase" button will purchase the bundle and deduct the gold from your total. |
| − | Completing | + | Completing all Vault bundles costs {{Price|42500}}, and repairs the [[Bus Stop]]. Taking the Bus grants access to [[The Desert|The Calico Desert]]. |
{| | {| | ||
| | | | ||
| − | {| class="wikitable" | + | {| class="wikitable" style="border-collapse: collapse;" |
| − | ! | + | |- |
| − | | id="cellstretch" |[[Bus Stop|Bus Repair]] | + | !style="background-color: #41AEFF; border-right: 0;"|[[File:Bundle Complete Balloon.png|link=]] |
| + | !style="background-color: #41AEFF; border-left: 0;"|Vault Reward | ||
| + | | id="cellstretch" style="padding-left: 8px;"|[[Bus Stop|Bus Repair]] | ||
|} | |} | ||
{| class="wikitable" | {| class="wikitable" | ||
| − | ! colspan= | + | ! colspan=2 id="g2500 Bundle"|[[File:Bundle Red.png|32px|link=]] 2,500 Bundle |
|- | |- | ||
| [[File:2500 Bundle.png|center]] | | [[File:2500 Bundle.png|center]] | ||
| − | | [[File:Bundle Purchase.png|center|link=]] | + | | style="text-align: center;"|[[File:Bundle Purchase.png|center|link=]] <p>{{price|2500}}</p> |
| − | |||
| − | |||
|- | |- | ||
| − | | | + | | id="cellcenter" |[[File:Bundle Reward.png|18px|link=]] Reward: |
| − | + | | {{name|Chocolate Cake|3}} | |
|} | |} | ||
{| class="wikitable" | {| class="wikitable" | ||
| − | ! colspan= | + | ! colspan=2 id="g5000 Bundle"|[[File:Bundle Orange.png|32px|link=]] 5,000 Bundle |
|- | |- | ||
| [[File:5000 Bundle.png|center]] | | [[File:5000 Bundle.png|center]] | ||
| − | | [[File:Bundle Purchase.png|center|link=]] | + | | style="text-align: center;"|[[File:Bundle Purchase.png|center|link=]] <p>{{price|5000}}</p> |
| − | |||
| − | |||
|- | |- | ||
| − | | | + | | id="cellcenter" |[[File:Bundle Reward.png|18px|link=]] Reward: |
| − | + | | {{name|Quality Fertilizer|30}} | |
|} | |} | ||
{| class="wikitable" | {| class="wikitable" | ||
| − | ! colspan= | + | ! colspan=2 id="g10000 Bundle"|[[File:Bundle Yellow.png|32px|link=]] 10,000 Bundle |
|- | |- | ||
| [[File:10000 Bundle.png|center]] | | [[File:10000 Bundle.png|center]] | ||
| − | | [[File:Bundle Purchase.png|center|link=]] | + | | style="text-align: center;"|[[File:Bundle Purchase.png|center|link=]] <p>{{price|10000}}</p> |
| − | |||
| − | |||
|- | |- | ||
| − | | | + | | id="cellcenter" |[[File:Bundle Reward.png|18px|link=]] Reward: |
| − | + | | {{name|Lightning Rod|1}} | |
|} | |} | ||
{| class="wikitable" | {| class="wikitable" | ||
| − | ! colspan= | + | ! colspan=2 id="g25000 Bundle"|[[File:Bundle Purple.png|32px|link=]] 25,000 Bundle |
|- | |- | ||
| [[File:25000 Bundle.png|center]] | | [[File:25000 Bundle.png|center]] | ||
| − | | [[File:Bundle Purchase.png|center|link=]] | + | | style="text-align: center;"|[[File:Bundle Purchase.png|center|link=]] <p>{{price|25000}}</p> |
| − | |||
| − | |||
|- | |- | ||
| − | | | + | | id="cellcenter" |[[File:Bundle Reward.png|18px|link=]] Reward: |
| − | + | | {{name|Crystalarium|1}} | |
|} | |} | ||
|} | |} | ||
| Línea 757: | Línea 768: | ||
[[Category:Items]] | [[Category:Items]] | ||
[[de:Bündel]] | [[de:Bündel]] | ||
| − | |||
[[ja:バンドル]] | [[ja:バンドル]] | ||
[[zh:收集包]] | [[zh:收集包]] | ||
Revisión del 09:43 9 abr 2017

|
Traducción incompleta Este artículo o sección no ha sido completamente traducido al español.
Le invitamos a ayudar en su construcción editándolo |
Bundles are donations to the Junimos given via golden scrolls inside the Community Center. When a bundle is complete, the Junimos offer you a reward. When all bundles for a particular room in the Community Center are complete, the Junimos grant a special reward that sometimes benefits the entire community.
Bundle rewards are given immediately, but rewards for completing all bundles in a room are given at the end of the day via a cutscene depicting the Junimos fulfulling the reward.
A few bundles display more items than there are slots to fill (e.g., Artisan Bundle: 12 items, 6 slots to fill). In this case, you can choose which of the shown items you want to use to fill the bundle. You do not have to use all shown items, only enough to fill the slots.
Completing all bundles restores the Community Center back to brand new and unlocks the "Local Legend" Achievement. The day after all bundles are complete, there will be a cutscene showing the grand re-opening of the Community Center. (This event is triggered by entering Pelican Town Square.)
If you opt to purchase a MercaJoja Membership, the Community Center is turned into a Joja Warehouse instead. After this happens, the bundles will be completed by the Joja Corporation for a fee given to Morris, the local MercaJoja manager, through the Joja Community Development Form.
There are a total of 6 rooms and 30 bundles to complete in the Community Center. In the Joja Warehouse, there are 5 rewards to purchase (the "Friendship" reward is not available).
Bundle Progress can be checked at any time by clicking on the Golden Scroll icon at the top right of the Player Menu (above the Garbage Can and "organize" icons).
Travelling Cart Availability
All items required for bundles have a small chance of appearing in the Travelling Cart stock, except for the items listed below. These items will never be sold at the Travelling Cart:
|
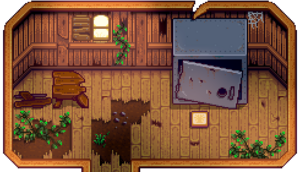
Crafts Room
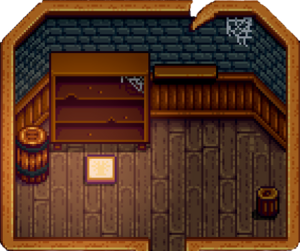
The Crafts Room contains the first group of bundles available. Completing all Crafts Room bundles repairs the bridge east of The Mines, giving you access to the Quarry.
Alacena
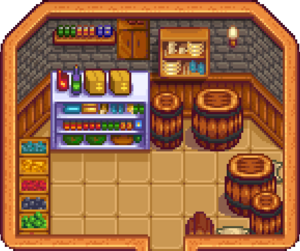
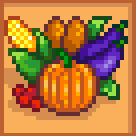
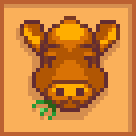
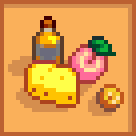
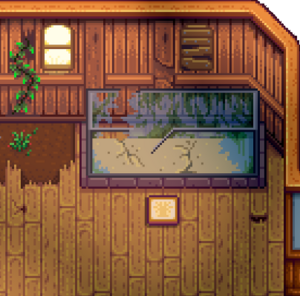
The Pantry appears after completing one bundle. Completing all Pantry bundles will restore the dilapidated Greenhouse on your farm, making it available to grow Crops and Fruit Trees year-round.
| |||||||||||||||||||||||||||||||||||||||||||||||||||||||||||||||||||||||||||||||||||||||||||||||||||||||||||||||||||||||||||||||||||||||||||||||
Fish Tank
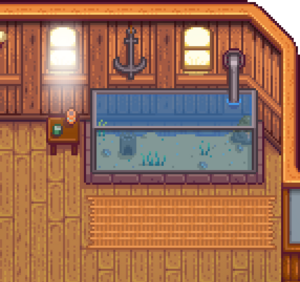
The Fish Tank appears after completing one bundle. Completing all Fish Tank bundles will remove the Glittering Boulder to the left of The Mines entrance. Willy will also give you a Copper Pan that can be used to collect metal ores and other items from bodies of water.
Note: It may not be possible to finish the Specialty Fish Bundle before finishing the entire Vault section, as you need access to the Desert to get a Sandfish, unless it becomes available at the Traveling Cart.
| |||||||||||||||||||||||||||||||||||||||||||||||||||||||||||||||||||||||||||||||||||||||||||||||||||||||||||||||||||||||||
Boiler Room
The Boiler Room appears after completing two bundles. Completing all Boiler Room bundles repairs the Minecarts, allowing you to fast travel between distant locations.
| |||||||||||||||||||||||||||||||||||||||||||||||||||||||
Bulletin Board
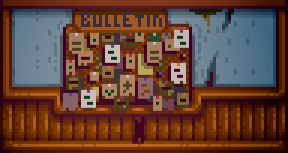
The Bulletin Board appears after completing three bundles.
Completing all Bulletin Board bundles improves the player's friendship rating with every non-datable villager by two hearts (500 points).
The morning after, Mayor Lewis will send a letter saying that packages containing items posted about "years ago" on the community center bulletin board have been appearing in villagers' homes. He says the packages are all addressed from "your farm." He expresses his gratitude and says "all of us in town are delighted!"
| |||||||||||||||||||||||||||||||||||||||||||||||||||||||||||||||||||||||||||||||||||||||||||||||||||
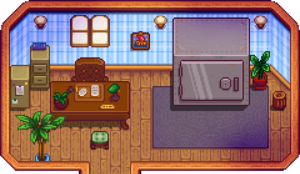
Vault
The Vault becomes available after completing four bundles. Pressing the large "purchase" button will purchase the bundle and deduct the gold from your total.
Completing all Vault bundles costs ![]() 42 500, and repairs the Bus Stop. Taking the Bus grants access to The Calico Desert.
42 500, and repairs the Bus Stop. Taking the Bus grants access to The Calico Desert.
| |||||||||||||||||||||||||||

